The emotional curve: how to plan the pacing of a video or a short film before the music exists
No track yet? You can still plan. Draw how intense the video should feel from first second to last, cut your sections on that line, and let the music land on top when it arrives.
Most advice about pacing assumes you have the music. Cut to the beat, follow the chorus, let the drop carry the montage. It's good advice, and it's useless on the day you actually have to plan — because the composer is still writing, the client hasn't chosen between three tracks, or you won't license anything until the edit is approved.
So the planning waits. And then the shoot happens without it.
There is a way to plan the rhythm of a video, or of your short film, with no audio at all. You draw it.
What an emotional curve is
It is a line. Time runs left to right; intensity runs bottom to top. Low means calm, slow, held back. High means everything you've got.
Writers have drawn story shapes like this for a long time — Kurt Vonnegut famously did it on a blackboard. For a short film, a travel video or a brand video it is more useful still, because in three minutes the only structure you have is how the intensity rises and falls.
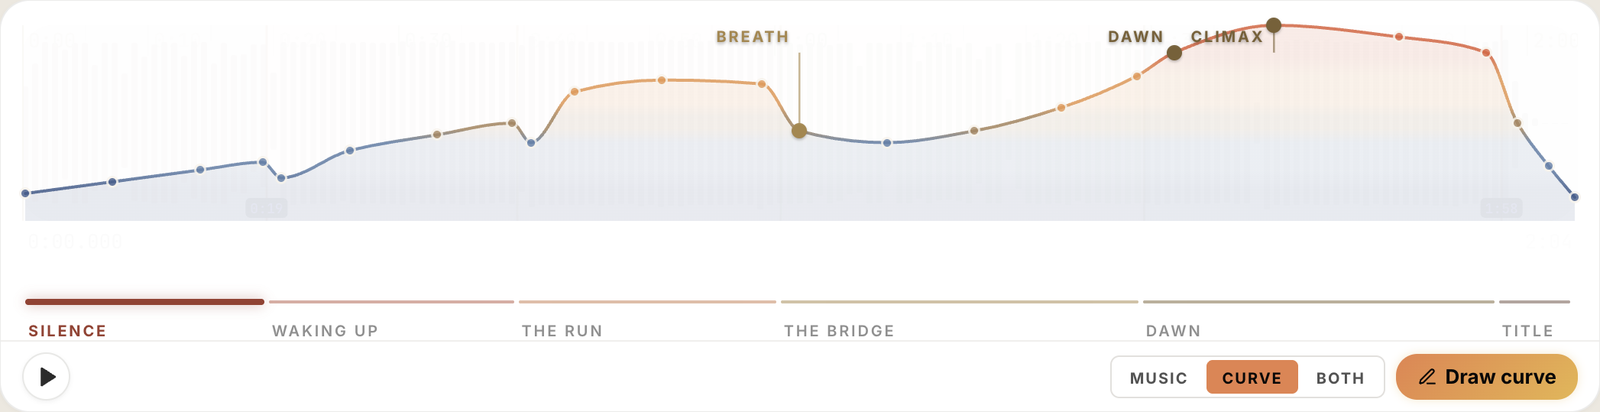
Drawing one, in five moves
1. Fix the duration first. Even a guess. "About two minutes" is enough to start; a curve with no length can't be cut into seconds.
2. Place the climax. One point, the highest. In short videos it almost always sits between two thirds and three quarters of the way through. Earlier, and the ending drags. Later, and there's no room to land.
3. Decide where you start and where you end. Starting low gives you somewhere to go. Ending low gives the audience a way out; ending high is a cut to black, and that is a choice, not a default.
4. Add a valley before the peak. This is the move people skip. A climb with no dip reads as flat — intensity is only felt as contrast. One clear breath before the final rise is worth more than any amount of fast cutting at the top.
5. Add one early bump. A small rise in the first third, so the video doesn't spend a minute at the bottom asking for patience.
That's the curve. Five or six points, joined up.
Cutting sections on the curve
A section boundary goes wherever the slope changes: where flat turns into a climb, where the climb peaks, where it falls. On the example above that gives six sections — the same number you'd get from most songs, which is not a coincidence.
Give each one a name and, as with a song, a job. The method is the same as in how to cut a song into narrative sections; you are just reading a line instead of listening.
Turning height into shots
The curve is not decoration. Its height at any second tells you what kind of shot belongs there:
| Where the curve is | How long shots stay | What they look like |
|---|---|---|
| Low and flat | 5–8 seconds | Static, wide or detail, nothing moves |
| Rising | 3–4 seconds, getting shorter | Movement starts: walking, travelling, pans |
| The valley before the peak | One long take | Stillness. A face, a pause, a held wide |
| Climax | 1–2 seconds | Your best footage, close, moving, fast |
| Falling | 4–6 seconds, getting longer | Pull back. Last light. Let it breathe |
Now a 20-second stretch at the bottom of the curve needs three or four shots, and 20 seconds at the top needs twelve. You can write the shot list — and count it — without a note of music.
When the music arrives
The curve is also the best brief you will ever give a composer, or yourself when you're searching a music library: two minutes, builds slowly, a breath around 0:55, peaks from 1:30, ends quiet. You are no longer looking for "something cinematic". You are looking for a track with that shape.
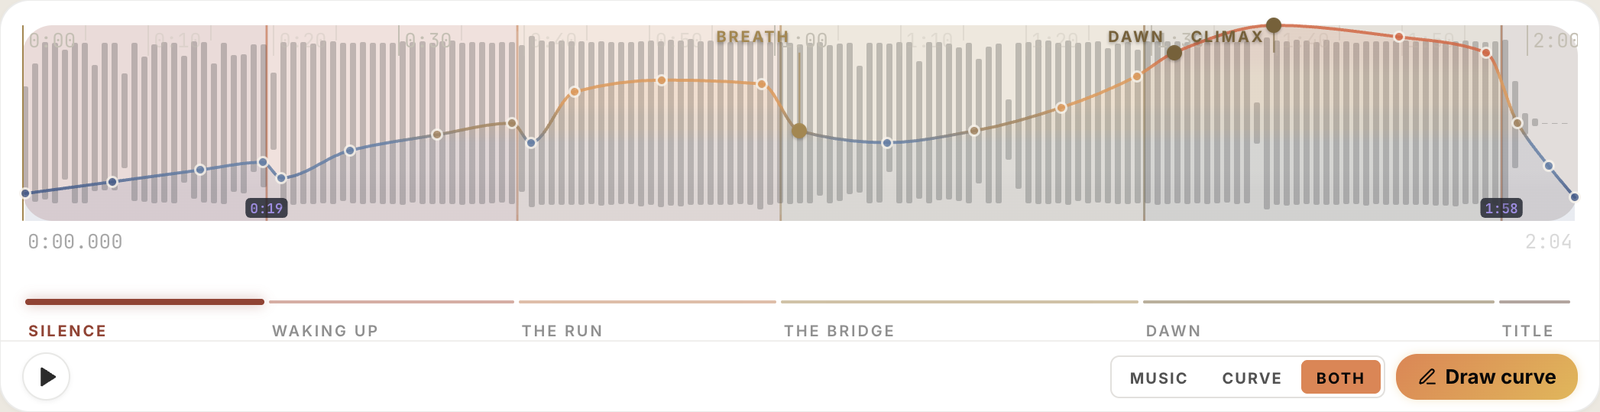
When you have it, lay the curve over the waveform. They won't match exactly. Move your cuts to the real changes in the track, keep the curve as the intention, and check which shots fell outside their section. Your plan survives; it just snaps to real seconds.
The same thing in PreFrame
PreFrame lets you start a project with no audio: you set a duration and draw the curve directly on the timeline — click to add a point, drag to shape it, double-click to label a moment.
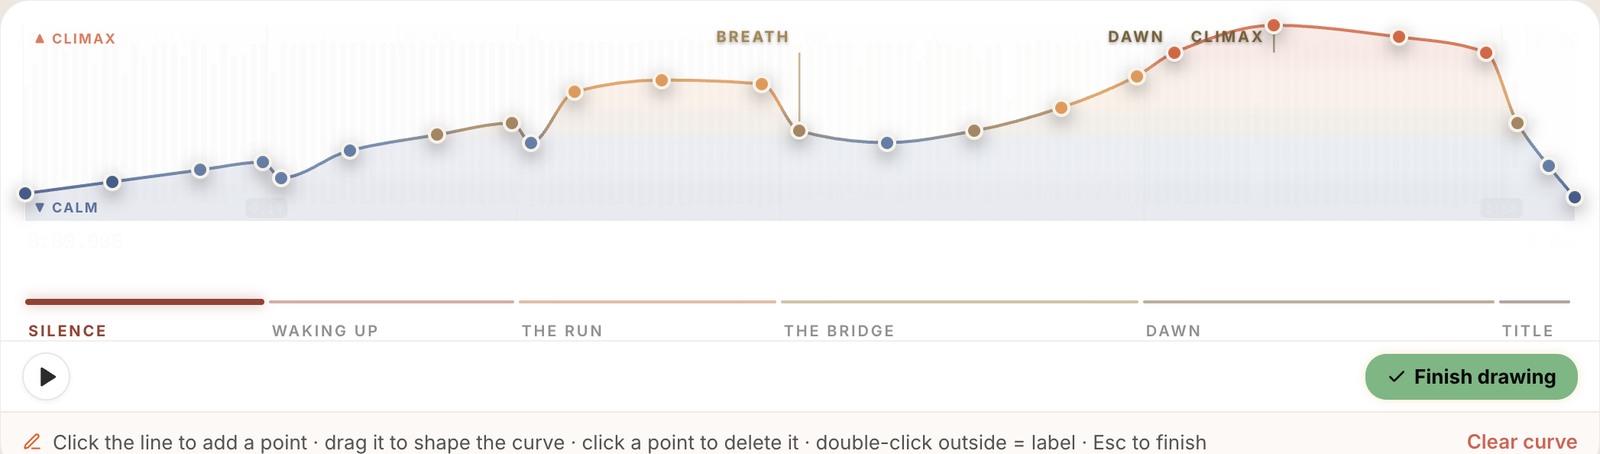
You cut sections on it and place shots on its seconds exactly as you would on a song. The curve is coloured by intensity, cool at the bottom and warm at the top, so you can see the shape of the film at a glance.
The day the track lands, you attach it to the same project. Nothing is stretched or trimmed to fit: your sections and shots stay on their seconds, every peak of the curve keeps its place, and any extra length shows up as uncovered time, ready to plan. A switch on the timeline lets you look at the music, the curve, or both at once.
What happens to a project when the audio is added or changed is explained in support.