How to plan a music video around the song, step by step
A music video is planned from a track, not from a script. Nine steps from the final master to the first day of shooting — sections, shot budgets, performance coverage and playback on set.
A short film is planned from a script. A music video is planned from a song, and that changes the order of everything. The running time is fixed before you start. So is the pace, and so are the moments where something has to happen on screen, because the track is going to make them happen whether your footage is ready or not.
Most music video plans go wrong in the same way: the concept is strong, the shot list is long, and nobody checked either of them against the actual seconds of the song. This is the order that avoids it.
1. Get the final master
Not the demo, not the rough mix. A new master can move a chorus by two seconds or add four bars to the intro, and every timing you planned moves with it. If the final isn't ready, plan on what you have and keep the structure loose — but know that anything you time to the frame is provisional.
Write down the BPM while you're at it. You'll need it on set.
2. Cut the song into sections
Intro, verse, pre-chorus, chorus, bridge, outro — then rename them for what happens in your video. Five to seven sections for a typical single. The full method is in how to cut a song into narrative sections.
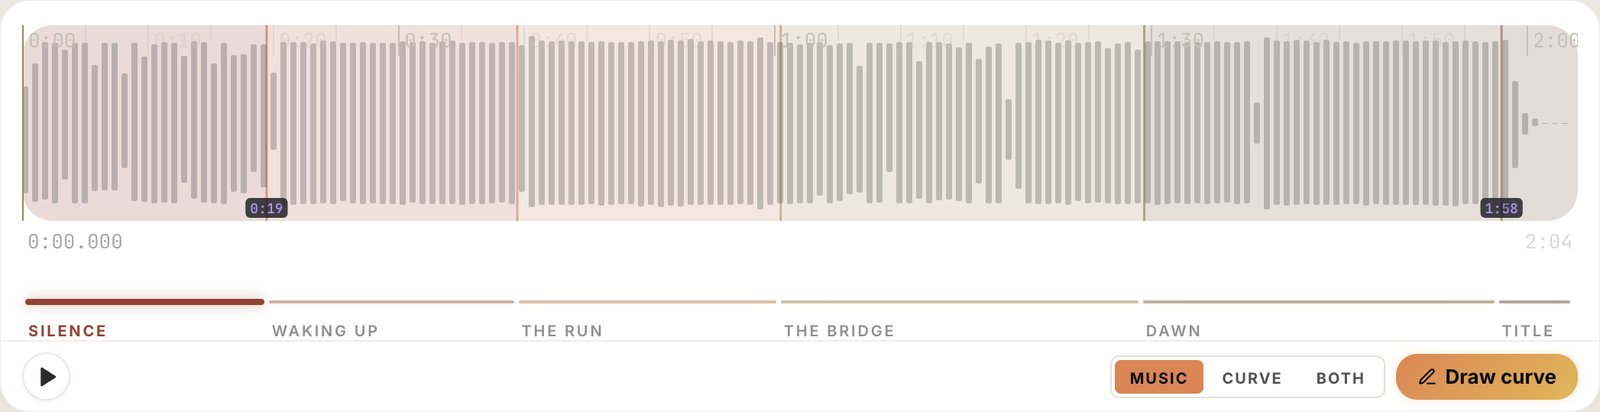
3. Decide what each section is made of
Almost every music video is some mix of three materials:
| Material | What it is | Where it usually goes |
|---|---|---|
| Performance | The artist singing or playing to camera | Choruses; anywhere the vocal carries the song |
| Narrative | A story, with or without the artist in it | Verses, where there is room to follow it |
| Texture | Details, places, abstract, b-roll | Intros, bridges, transitions |
Write one line per section: which material, and what happens. "Chorus 1 — performance, rooftop, wide and then close." "Verse 2 — narrative, she finds the letter." That page is the treatment, and it's already timed.
4. Give each section a shot budget
Length of the section divided by how long a shot stays on screen there. A 24-second verse cut every 4 seconds needs 6 shots. A 20-second chorus cut every second and a half needs 13 or 14.
A three-and-a-half-minute single lands somewhere between 70 and 120 shots. Seeing that number before the shoot is the difference between a day that finishes and a day that doesn't.
5. Plan performance coverage as full takes
Performance is shot differently from everything else: the standard practice is to run the whole song in each setup — wide, medium, close, a moving one — so the editor can cut between them anywhere.
Two things to decide in advance:
- How many setups, and which sections each one must nail. The close-up has to be perfect in the choruses; the wide can be loose there and matter in the intro. Mark it, so that on take five you know what you're still missing.
- How many full takes the day allows. Four setups × three takes × a four-minute song is most of an hour of rolling, before a single light is moved.
6. Write the narrative and texture shots against the seconds
These are planned like any other film to music: each shot has a name, a type, a duration and a place in the song. Sort them by time and you are reading the video top to bottom. If you're used to a classic shot list, this is what it's missing.
7. Check for uncovered time
Add up the shots in each section and compare with the section's length. Wherever they don't reach, there are seconds of song with no picture planned. Performance coverage will often fill them — but decide that on purpose, section by section, rather than finding out in the edit.
8. Prepare playback for the set
The artist has to perform to the track, and you have to be able to start it from anywhere.
- A speaker loud enough to be heard over the set, and someone whose only job is playback.
- The start time of every section written down, so "from the second chorus" is a number, not a search.
- A count-in — two bars of clicks at the song's BPM before each section — so the performance starts on time.
- If you're shooting slow motion, the track sped up by the same factor, so the lip-sync holds when the footage is slowed down.
9. Group the day by light and location, not by song order
You plan in the order of the song and you shoot in the order of the sun. Golden-hour shots go together even if one is the intro and the other the last chorus. The plan you print should be sorted for the day; the timecodes on every shot are what put it back in song order afterwards.
The same thing in PreFrame
PreFrame does this on the song itself. Drop the master in, cut the sections on the waveform, and lay out every shot on real seconds. In Focus mode there is nothing else on screen: the track, the cuts, the shots — and, next to them, a board of references that filters by section, so "Chorus 1" opens with the frames you wanted it to look like.
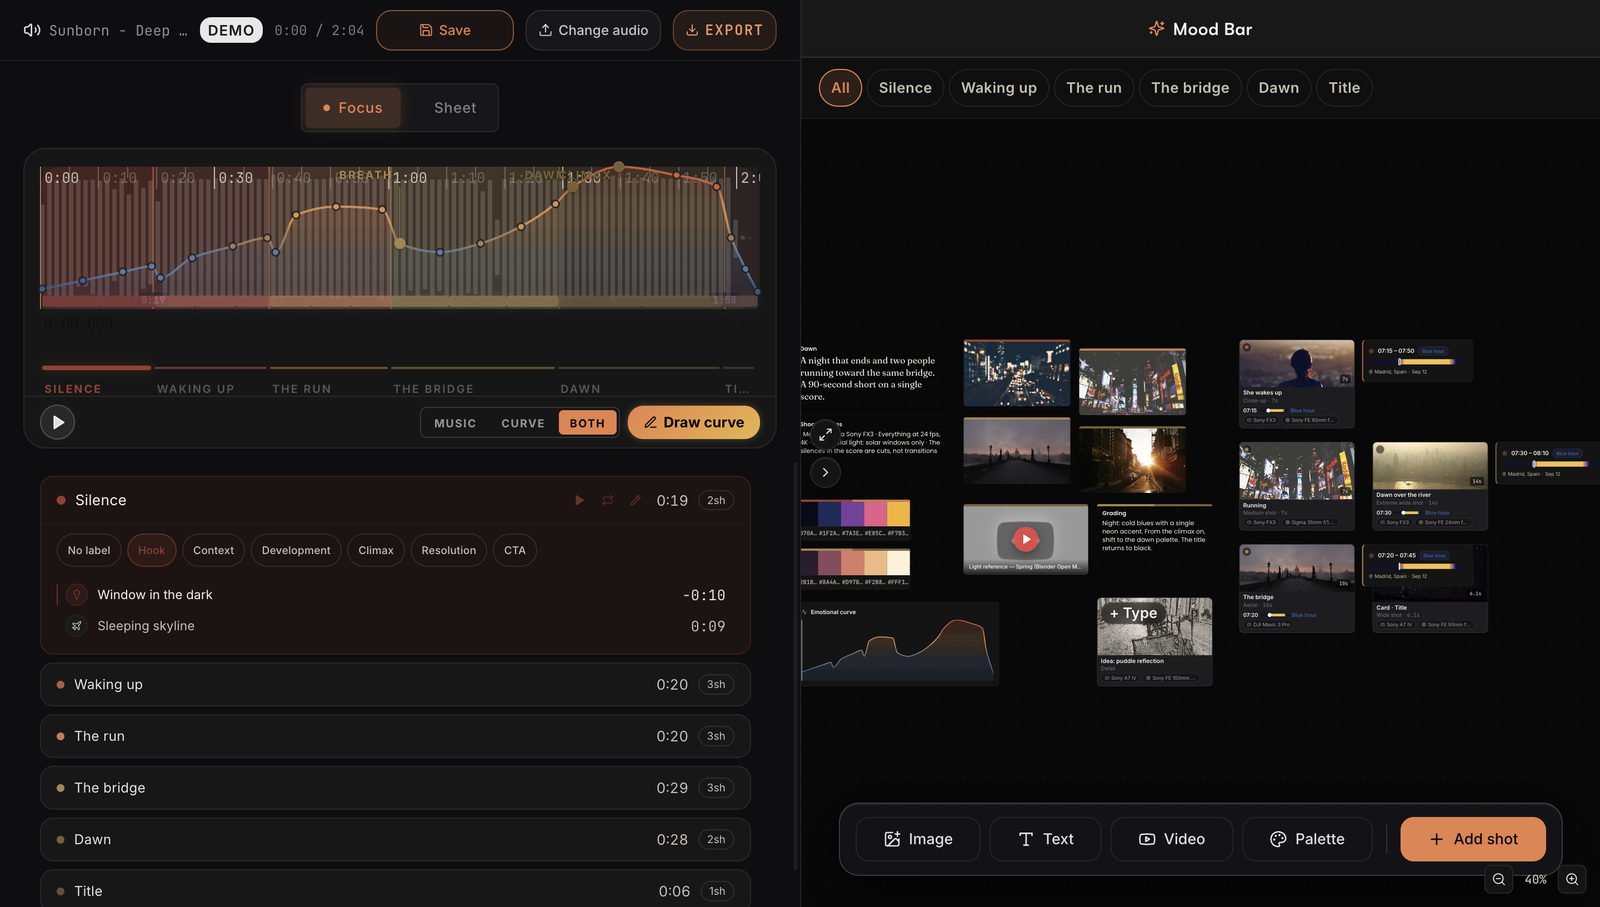
Each shot carries its type, camera, lens and notes, and can carry the light for that place and day. Uncovered time is calculated for you. When you export, you get two things:
- A printable shooting plan — every shot with its timecode, a box to tick, lines to write on, and the uncovered seconds printed where they fall.
- Markers for the editor — sections and shots as timeline markers for Premiere Pro, DaVinci Resolve or Final Cut, at 24, 25 or 30 fps. The edit opens with the song's shape already on the timeline. How the import works in each editor.
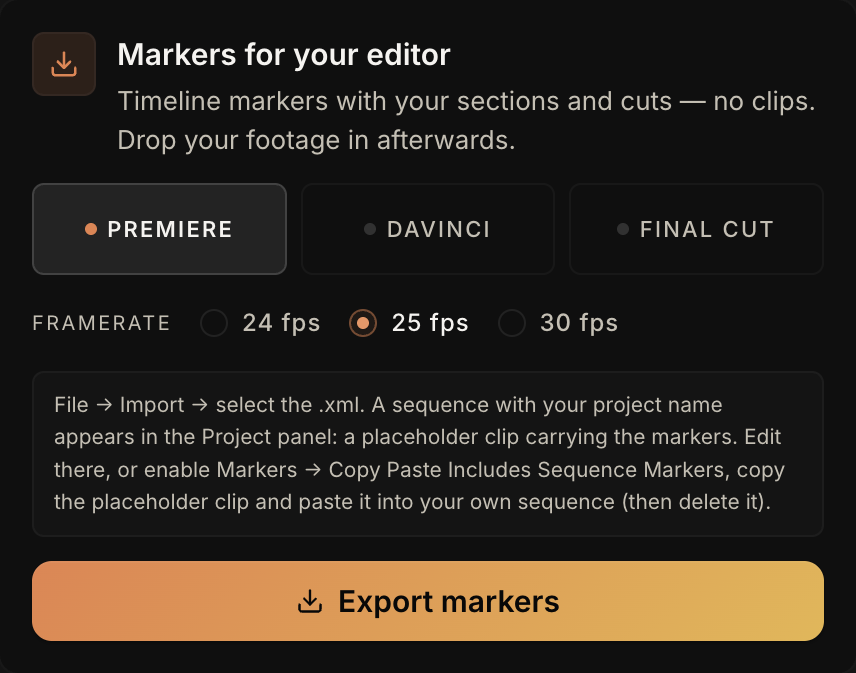
And if the master isn't finished, you can plan on an emotional curve and attach the track when it lands.