How to make a moodboard for a video that you'll actually use on the shoot
A moodboard for film isn't a wall of pretty frames. It's references sorted by the part of the piece they belong to — so that on location you open one section and see exactly what it should look like.
Most video moodboards are made with love and never opened again. Thirty beautiful frames on a Pinterest board or a Milanote canvas, collected in an evening, admired, and then left at home while you stand on location trying to remember what the opening was supposed to feel like.
The frames aren't the problem. The problem is that a moodboard built for inspiration is organised like a mood — everything at once — and a shoot is organised like a timeline: this part, then this part, then this one. If the board doesn't follow the piece, you can't use it while you're making the piece.
What belongs on a moodboard for video
Five kinds of thing, and a still image is only one of them:
| What | Why |
|---|---|
| Reference frames | Composition, light, distance to the subject. Three good ones beat thirty |
| Reference video | Movement and pace can't be seen in a still. A 10-second clip of the camera move you want |
| A colour palette | Five colours for the piece — or two palettes if the look changes partway through |
| Notes | The rules of the piece in your own words: "No artificial light." "The silences are cuts, not fades." |
| The shape of the piece | Where it's quiet and where it peaks. Without this the board has no order |
That last one is what turns a collage into a plan.
The method: one board, sorted by section
1. Cut the piece into sections first. From the song if you have it — here's how — or from an emotional curve if you don't. Five to seven sections, each with a name.
2. Collect freely, then assign. Gather references without judging. Then go through them and ask one question of each: which section is this for? A frame that isn't for any section is a frame you like, not a reference. Let it go.
3. Three references per section, maximum. One for light, one for framing, one for movement or texture. More than that and you're not deciding, you're postponing the decision to the day of the shoot.
4. Write what you're taking from each one. Under every reference, one line: "this light", "this distance", "this camera height". A reference without a note gets copied whole, and you end up remaking someone else's shot.
5. Give the palette a timeline too. If the piece goes from night to dawn, the palette does. Two palettes, each attached to the sections it rules.
6. Put the rules where you'll see them. Frame rate, what you will never do, what every shot must have. Three lines, at the top.
Using it on location
This is the test. Standing in the place, about to shoot section four, you should be able to open only section four and see: its three references, its palette, its note — and the shots you planned for it. Thirty seconds, phone or laptop, then the camera comes up.
If getting there means scrolling a canvas of sixty images, the board isn't finished.
The same thing in PreFrame
In PreFrame the moodboard — the Mood Bar — isn't a separate document. It's a canvas that lives next to the timeline of the same project, so the references and the plan are never in two different places.
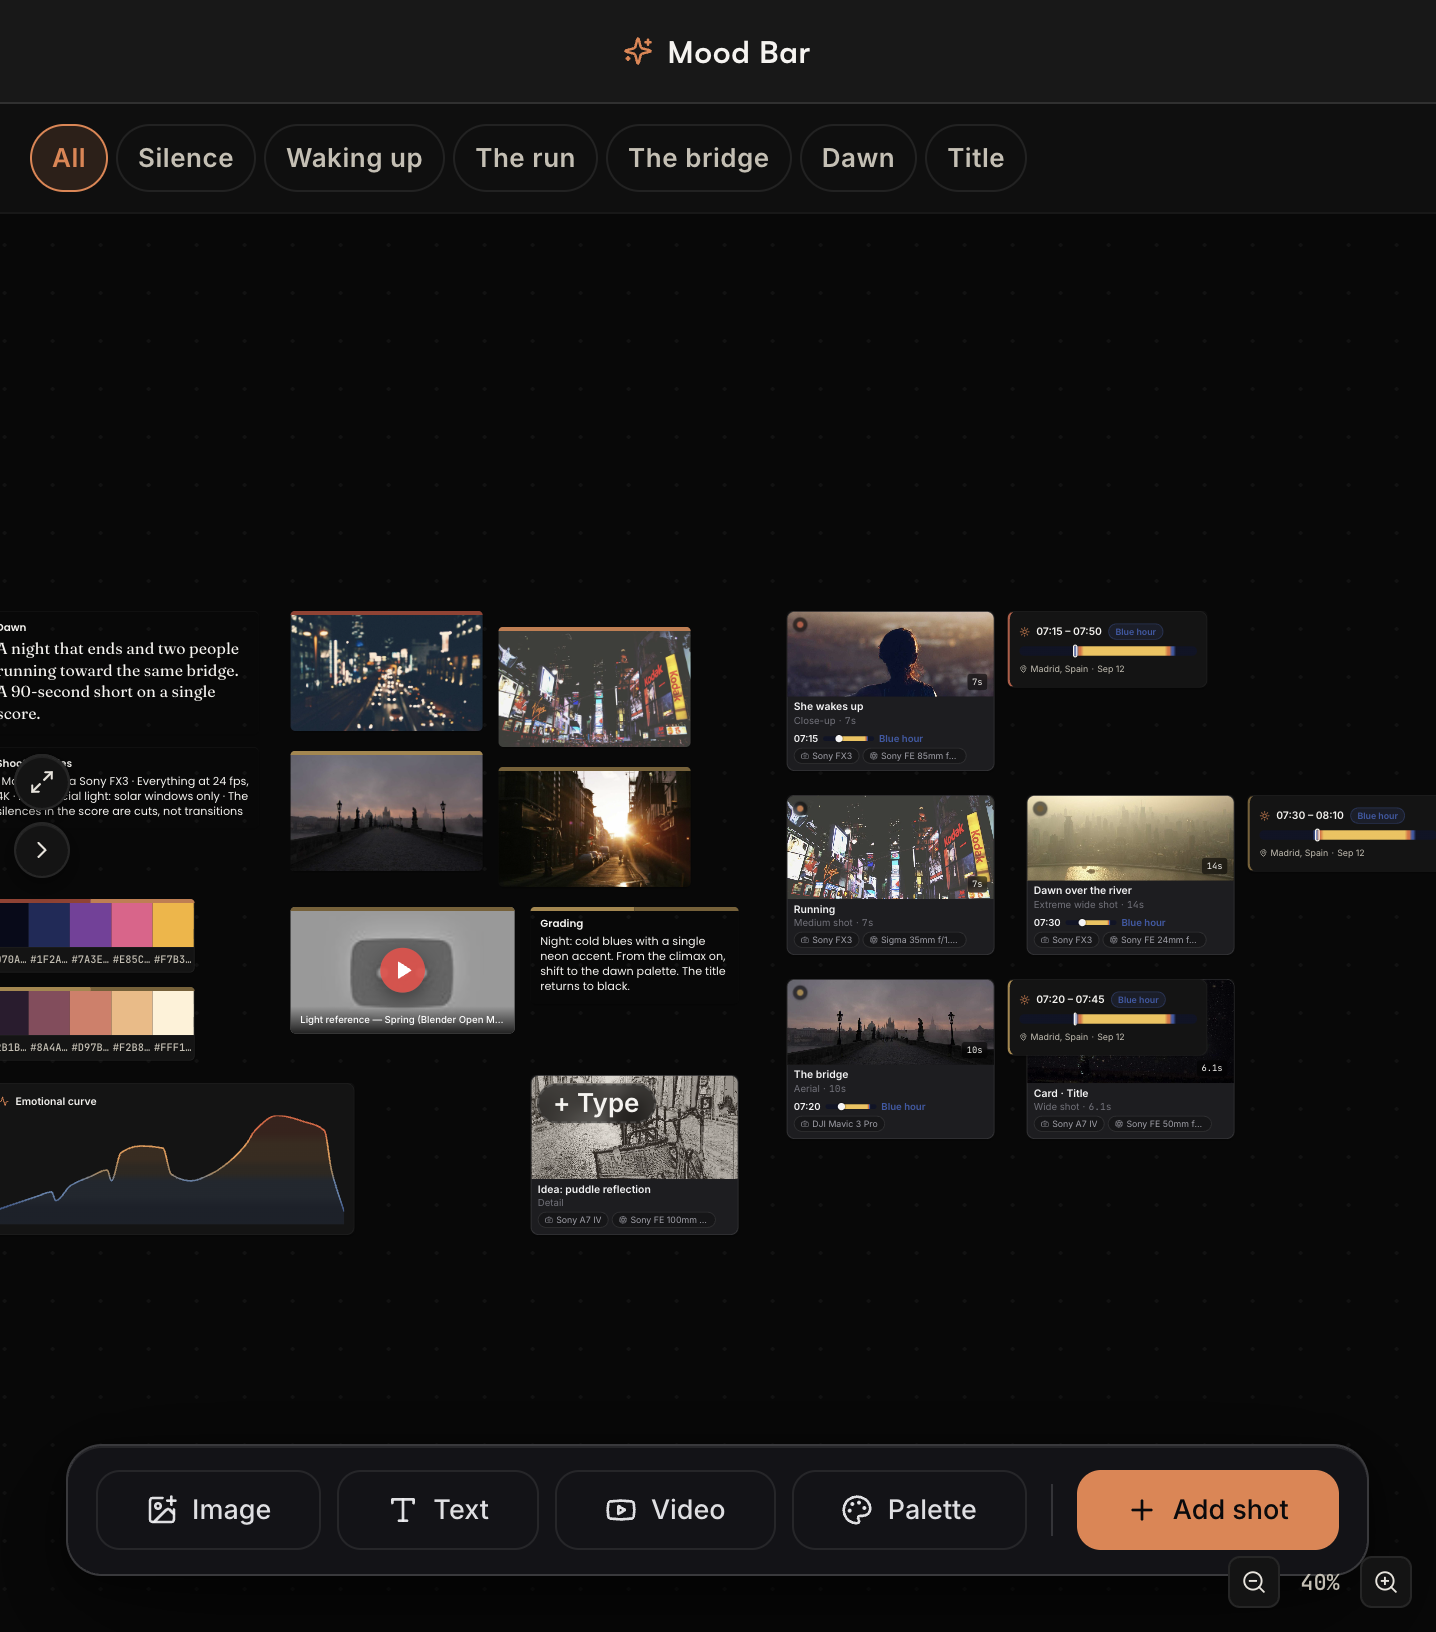
You add images, text, video and palettes from one toolbar, and the project's shots can sit on the canvas as cards alongside the references that inspired them.

The part that matters is the row of chips at the top. They are the sections of your piece, and they filter the canvas: choose "The bridge" and only what belongs to that section stays in view.

The canvas opens wide when you're collecting and folds into a side panel when you're planning shots, so the look of the piece stays in the corner of your eye the whole time.
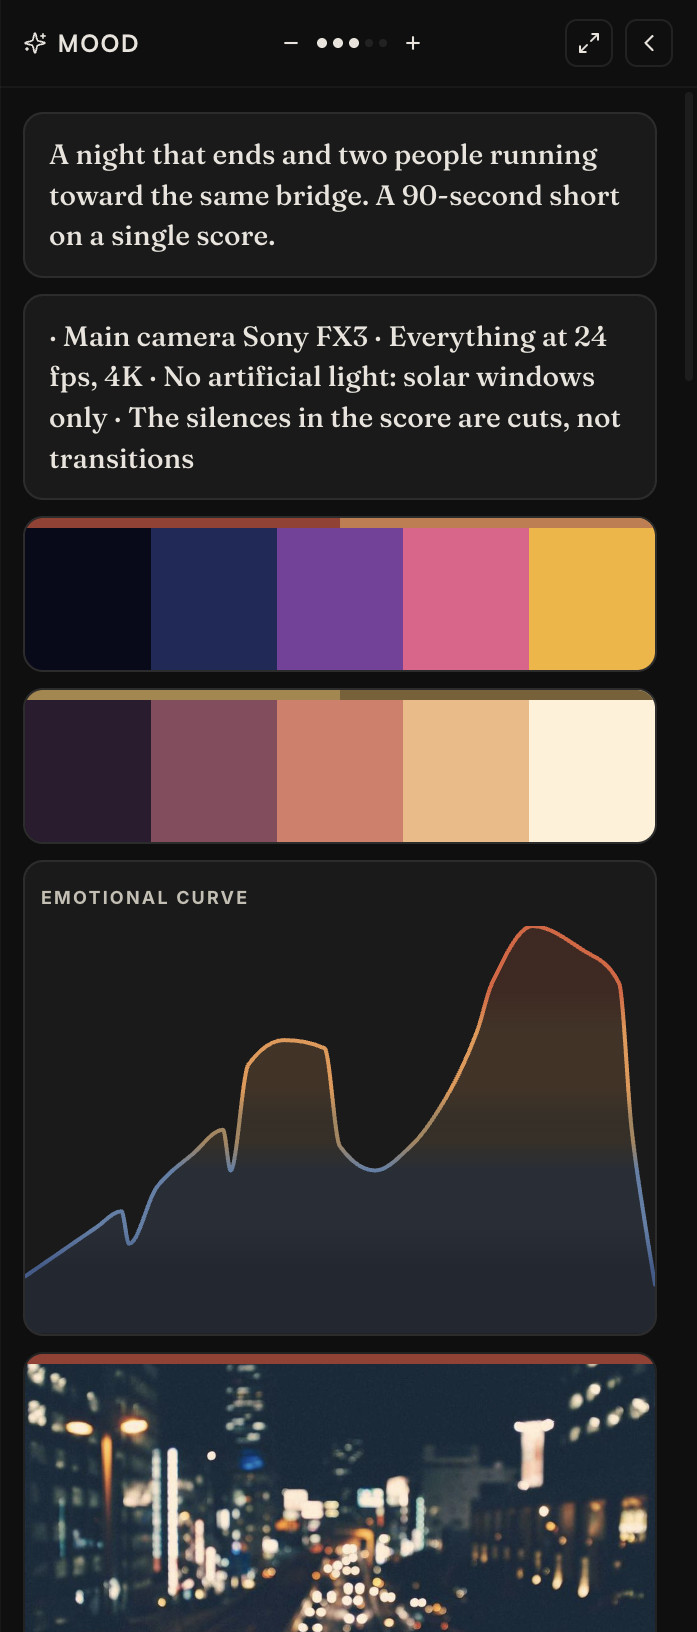
Your references stay on your machine — they're never uploaded — so the board works on a mountain with no signal, which is usually where you need it.
A moodboard you open once is decoration. One that answers "what should this part look like?" while you're standing there with the camera is part of the plan.